
We take photos because we want to hold onto a piece of our lives — and whether it’s your honeymoon or some other trip you’re planning, documenting your travels is definitely a high priority.
… At least if you’re me. Full disclosure: I’m often a work-is-more-fun-than-fun type of person, especially if that work is photography. And when I’m traveling, it’s second nature to treat the trip like I would a client’s wedding day: aiming to capture every little moment and detail.
I’m not suggesting everyone should be like this, and I’ve made efforts to reform and live a little less behind a camera when on vacation! But from all the times I’ve treated travel photography like it’s my job, I have some tips for getting great trip pics:
Make the most of light, even when it’s less than ideal.
In my ideal world, I’d shoot in a perpetual golden hour (or at least with clouds that diffuse the sun’s rays). But the reality when traveling is that the peak time for activities often isn’t in that golden window right after sunrise or right before sunset — and thus the light you get often is harsh and direct.
When working with this kind of light at a wedding (another scenario in which you can’t schedule all photos for golden hour), I often make use shady areas so my subjects are evenly lit, not marked by any shadows. And sometimes, you can also use this approach when traveling. But you likely won’t always have available shade — and even if you do, the background you want to use may be in full sun, which can create harsh backlighting if your subject is in a shady spot in the foreground.
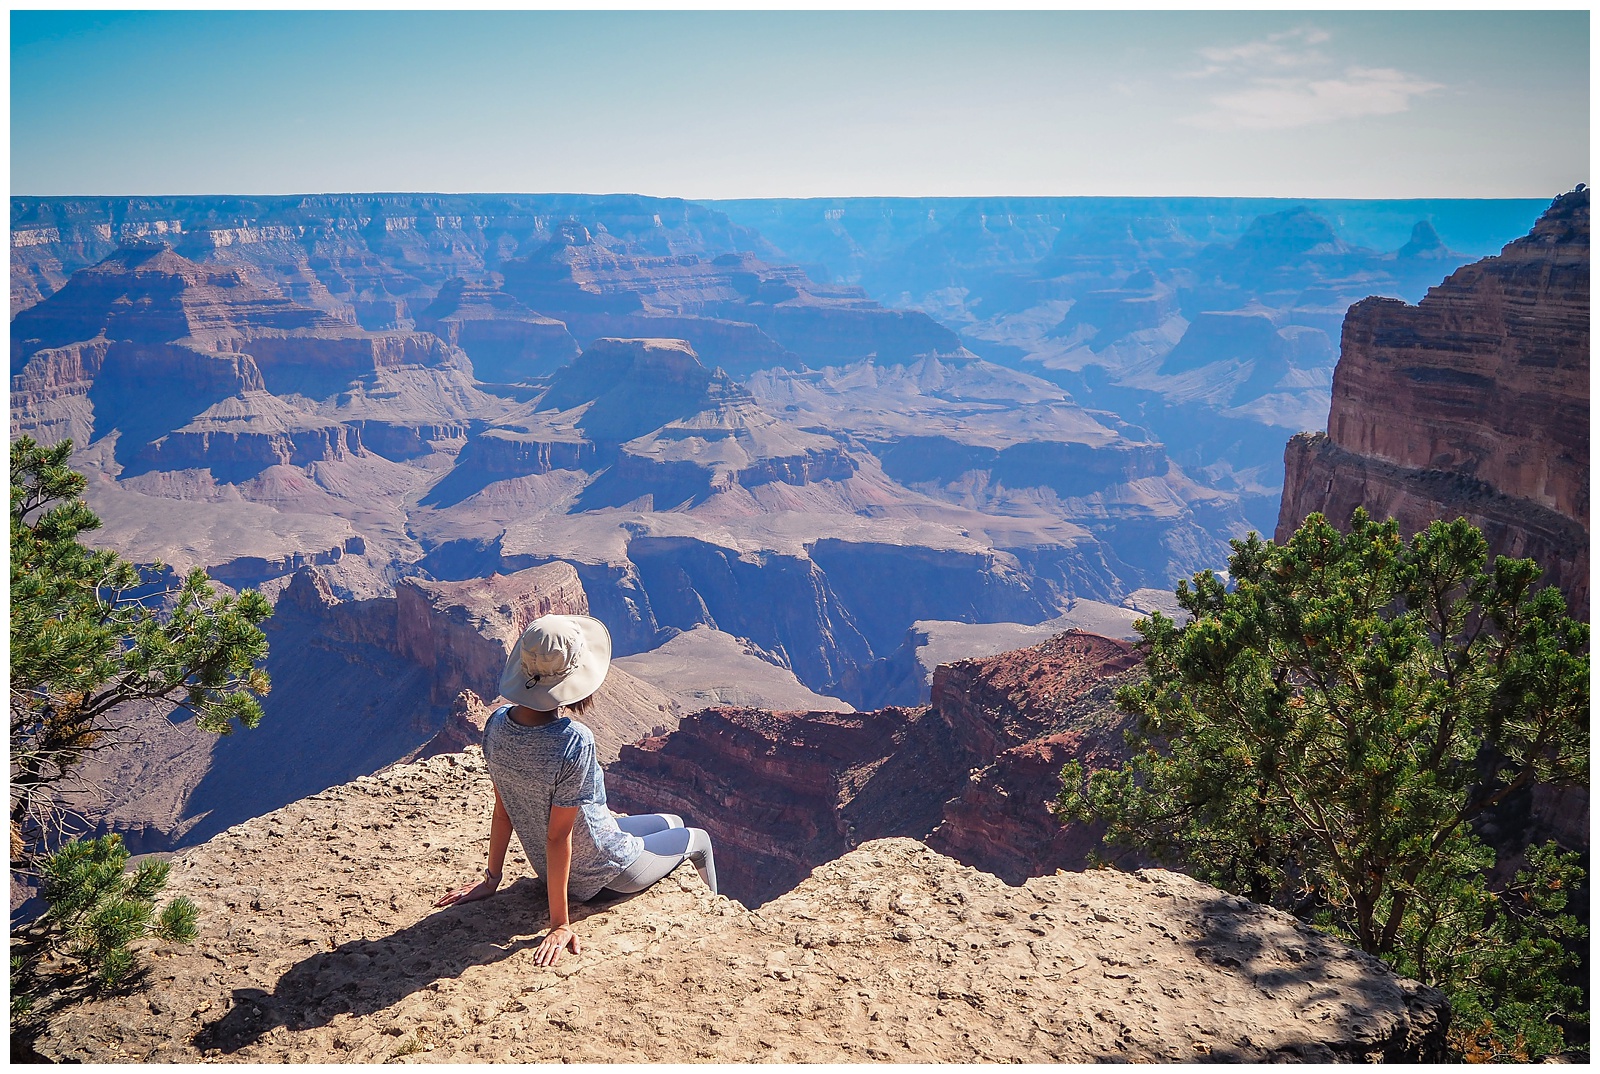
Sitting in full sun at the edge of the Grand Canyon — and making my husband a little bit nervous!
In this situation, all you can do is embrace the bright light and try to make sure everything in your shot is as evenly lit as possible. If photographing someone in front of a landscape, for example, make sure the light on that subject is the same as the light on the background.
Another tip: Sunglasses are awesome for hiding under-eye shadows that harsh light creates, and they also keep you from looking squinty-eyed in photos. So don’t head out on an adventure without that all-important eyewear!
Pay attention to what you don’t want in your shot.
Another factor that can make travel photography challenging are the crowds that often come with it. Of course, you can always embrace the crowds as part of the experience and just accept having random strangers in your photos.
But it’s also possible, by exercising a little extra patience and intentionality, to achieve a photo with a clean background. This may mean waiting a minute for other tourists to wander out of your frame, or it may mean adjusting your angle on your subject until you find one that crops out anyone you don’t want captured.
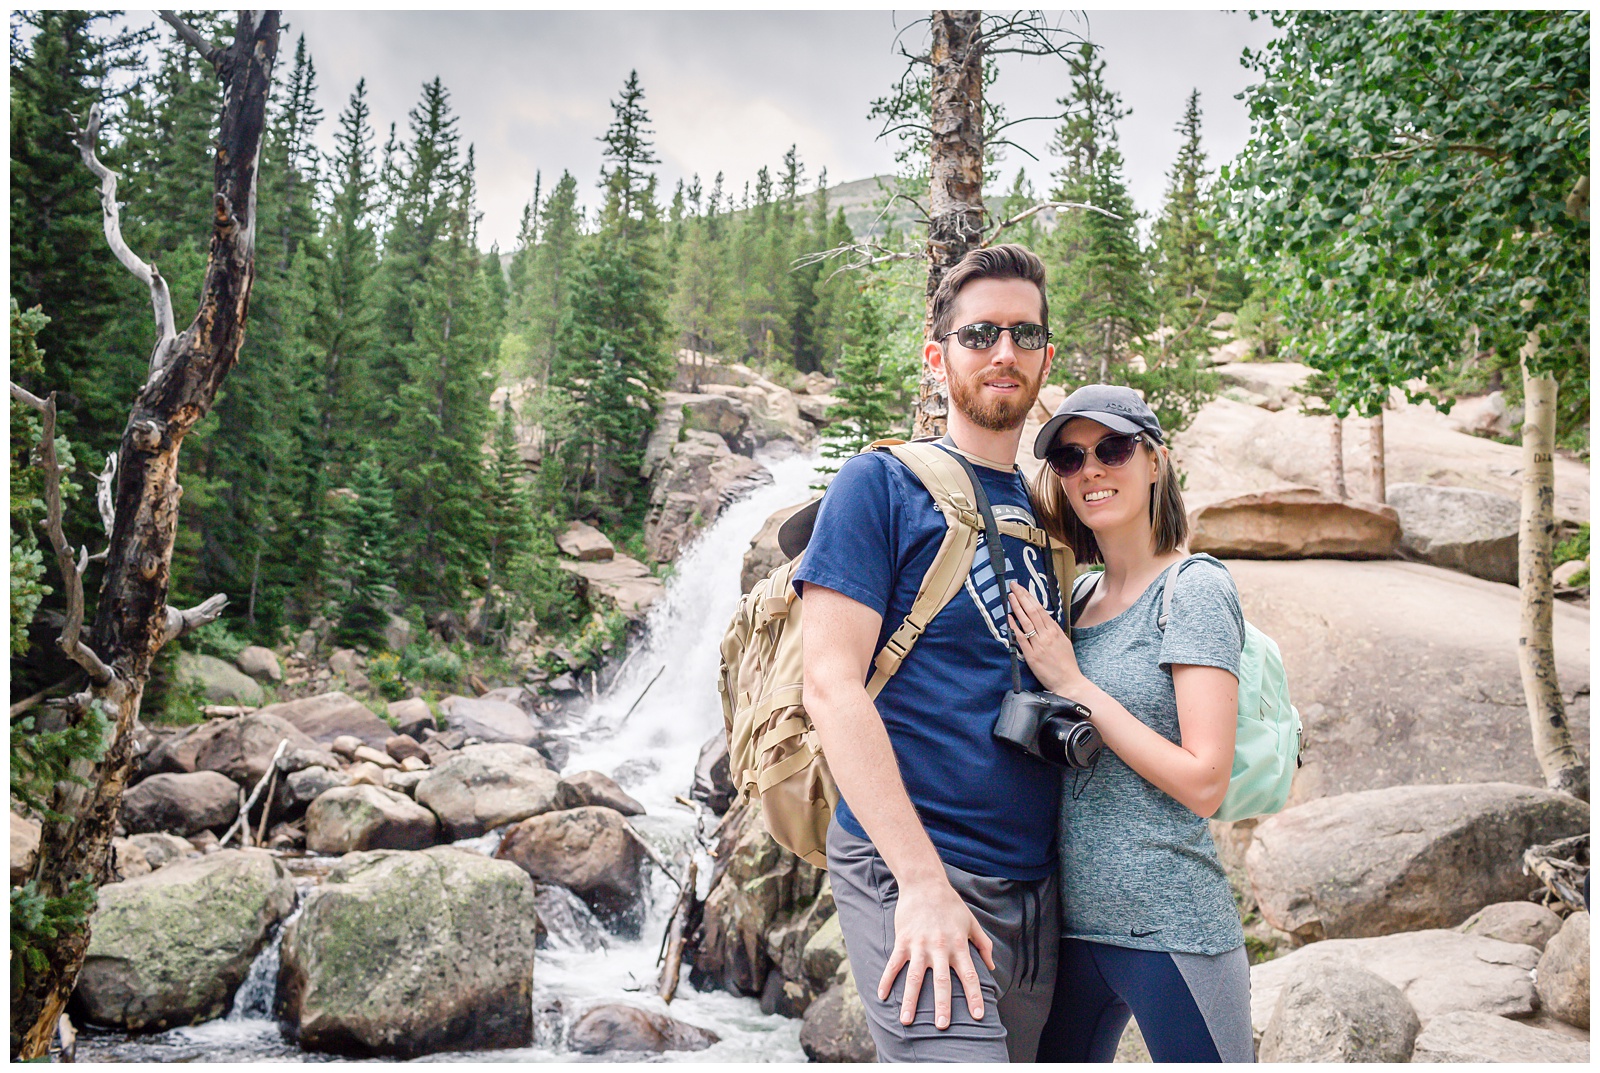
This sight in Rocky Mountain National Park was crawling with other hikers, but my mom managed to find a moment and an angle for capturing us that kept everyone else out of the shot.
Also keep in mind that people aren’t the only offenders when it comes to cluttering a background. Any number of other objects — from trash cans to construction cones to colorful signage — can make your pictures less picturesque than they would be otherwise. It’s not always possible to shoot around them, but it’s worth framing your subject a few different ways to see if any avoid those unflattering “extras.”
Don’t sacrifice clear focus for artistic effect.
The soft-focus background effect called bokeh is beloved by many because it creates really pretty photos. But if your background is the Eiffel Tower or something equally iconic, you want it as sharply in focus as anyone you’re photographing in the foreground.
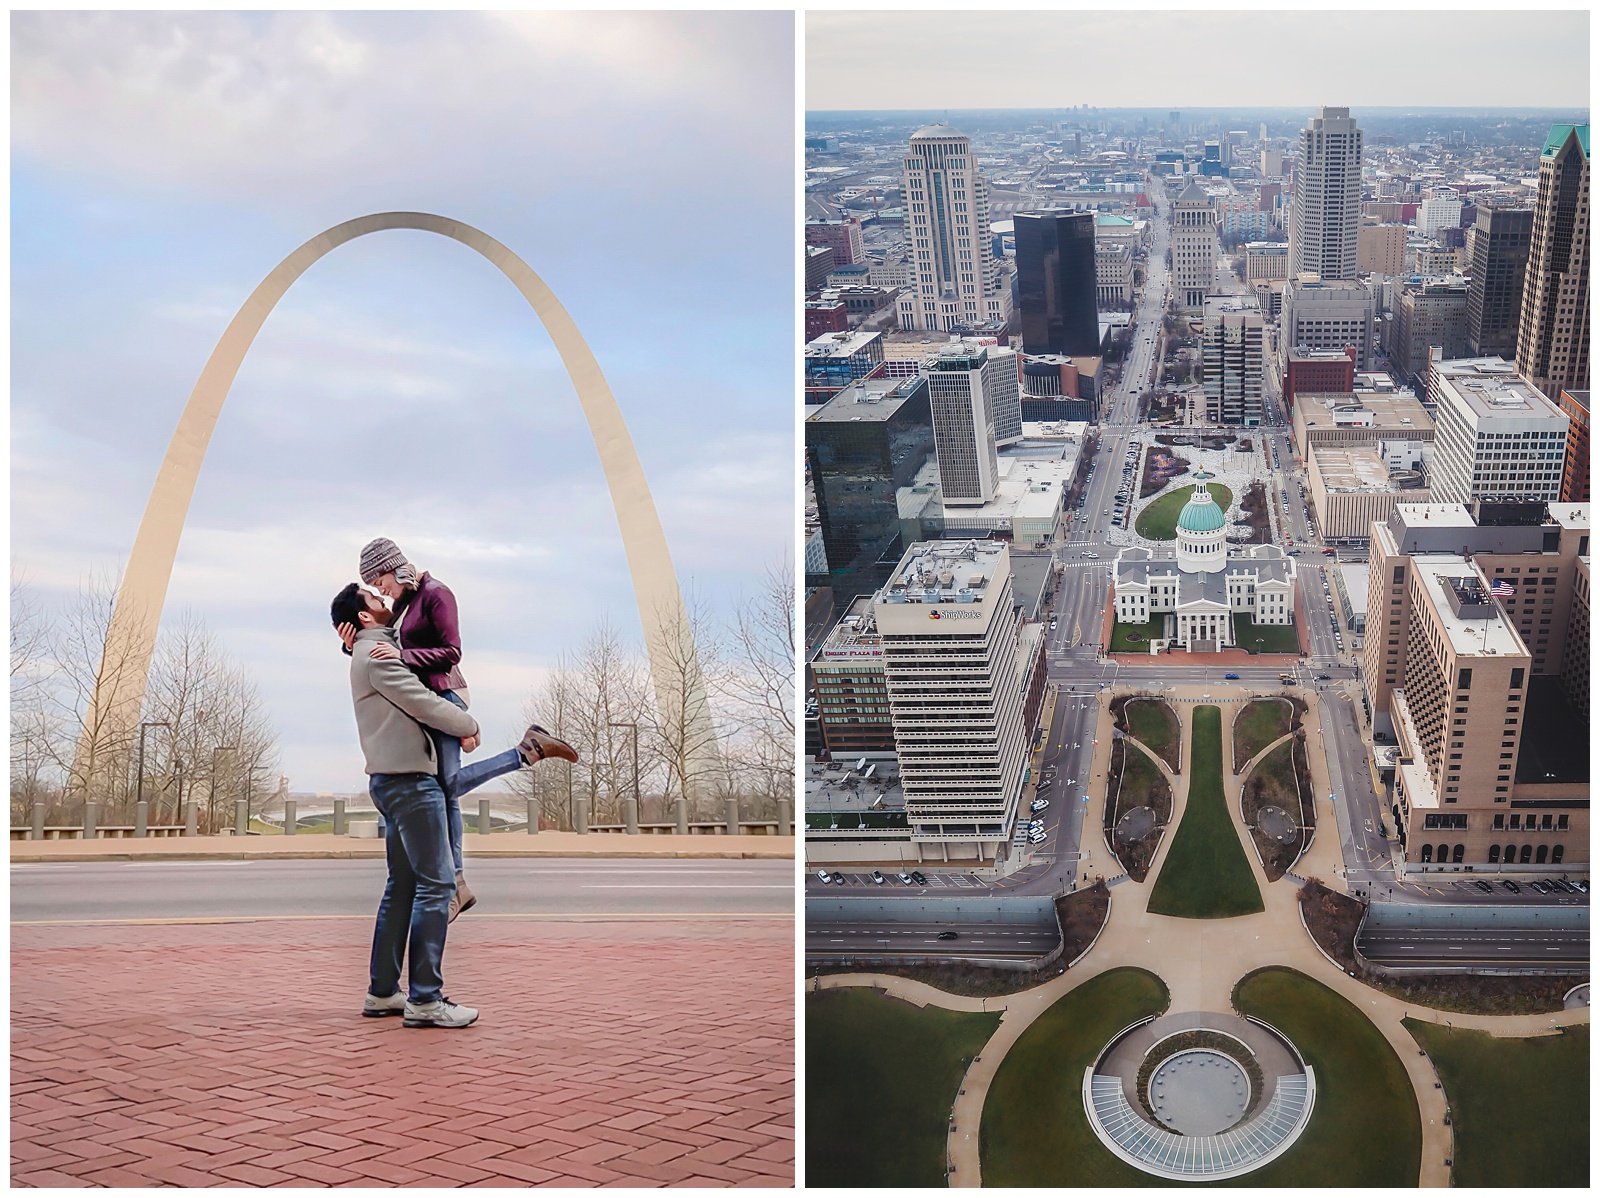
In-focus views of the Gateway Arch from the ground and of St. Louis from the top of the monument.
For phone photographers, the main takeaway here is to use portrait mode selectively when traveling. It’s great for when the foreground subject is all that matters, but not when you have a background that is better not blurred out. And for DSLR or other manual-setting shooters, achieving that sharp background with a foreground subject that’s much closer to the camera often means operating around f/8 — which is always a mindset shift for me, given that I rarely use that high an f-stop in any other shooting scenario.
However, if giving up that creamy bokeh is bumming you out, it’s always an option to take some portraits with it and to pair those with photos that show your location entirely in focus. Variety isn’t only the spice of life; it’s also a very good approach to visual storytelling!
xxxxxxxxxxxxxxxxxxxxxxxxxxxxxxxxxxxxxxxxxxxx
Put yourself in the frame from time to time.
And not just through selfies! You want your trip memories to be not only of the places you visit but also of you in them, which is best achieved when you’re a decent distance from the camera.
And if you’re traveling with someone else (or multiple someones), it’s worth getting some photos that include both or all of you. This may require identifying another tourist who looks capable of capturing you — and the good news is, you often don’t have to look far to find someone carrying a professional-looking camera. These individuals are not only less likely to be intimidated by whatever kind of camera you hand them but also more likely to have an eye for framing a photo, since they seemingly practice photography at least as a hobby.
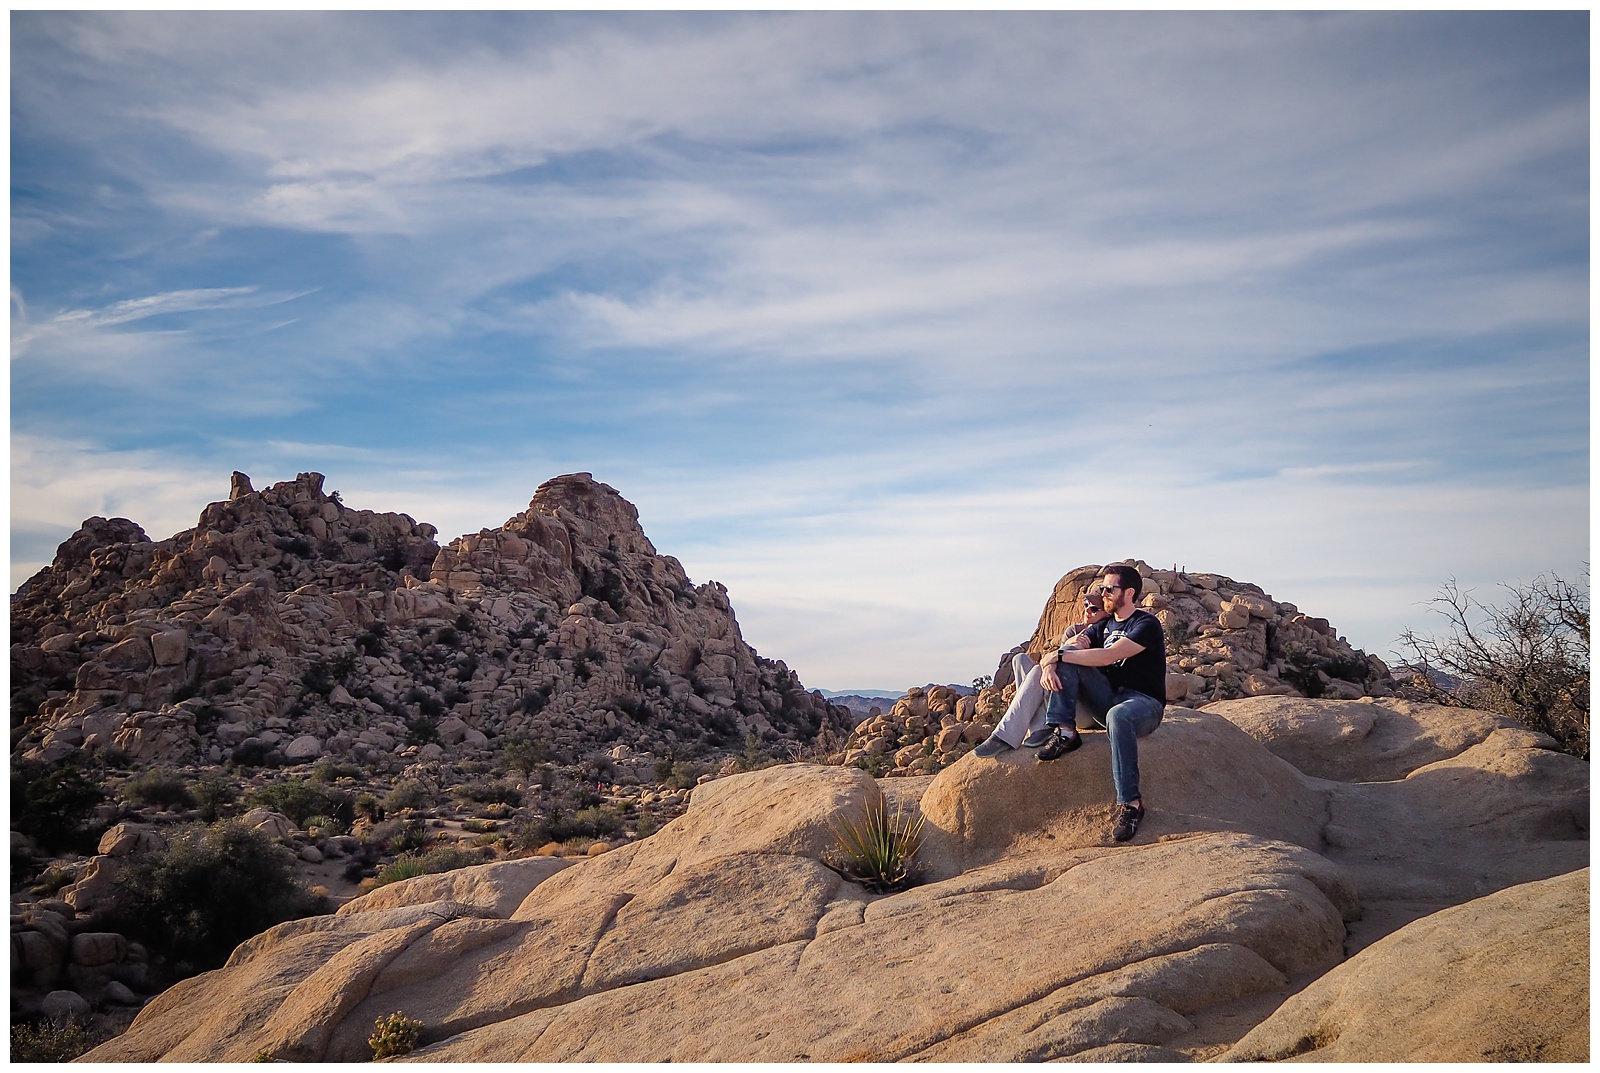
Soaking up some January sun in Joshua Tree National Park. We didn’t have a tripod for this shot — but sometimes a well-placed rock formation works just as well!
If you, like me, will go to great lengths for a photo, it’s also an option to travel with a tripod and to use it for self-portraits when you’re somewhere without a ton of other photo-takers around. I don’t spend entire vacations toting around a tripod, but I sometimes do take one on trips to use for a select few shots. Which brings me to my last point …
Plan ahead for must-have photos.
I saved the best for last, and I call this the best because I fully believe you don’t have to come away from a trip with hundreds of frame-worthy photos for it to have been a photographic success. Even just one awesome shot can be a really satisfying souvenir, and a little forethought can go a long way toward creating it.
Personally, my mindset as I’ve tried to become more moderate in my expectations for my travel photography is that I want a number of nice shots that preserve memories but am aiming for only one or two that I’d consider epic representations of that particular travel experience. This alleviates some of the pressure I put on myself, since not every single image has to be the stuff of my dreams. And it also often results in those few favorite photos that do end up in frames — since I direct my creative drive mainly toward them and therefore make a point to plan for them.
What does this mean for the more casual (i.e. less crazy) photo-taker? Basically: If you want to really level up on a select few of your photos, decide what your must-haves are for those images and what it will take to make them.
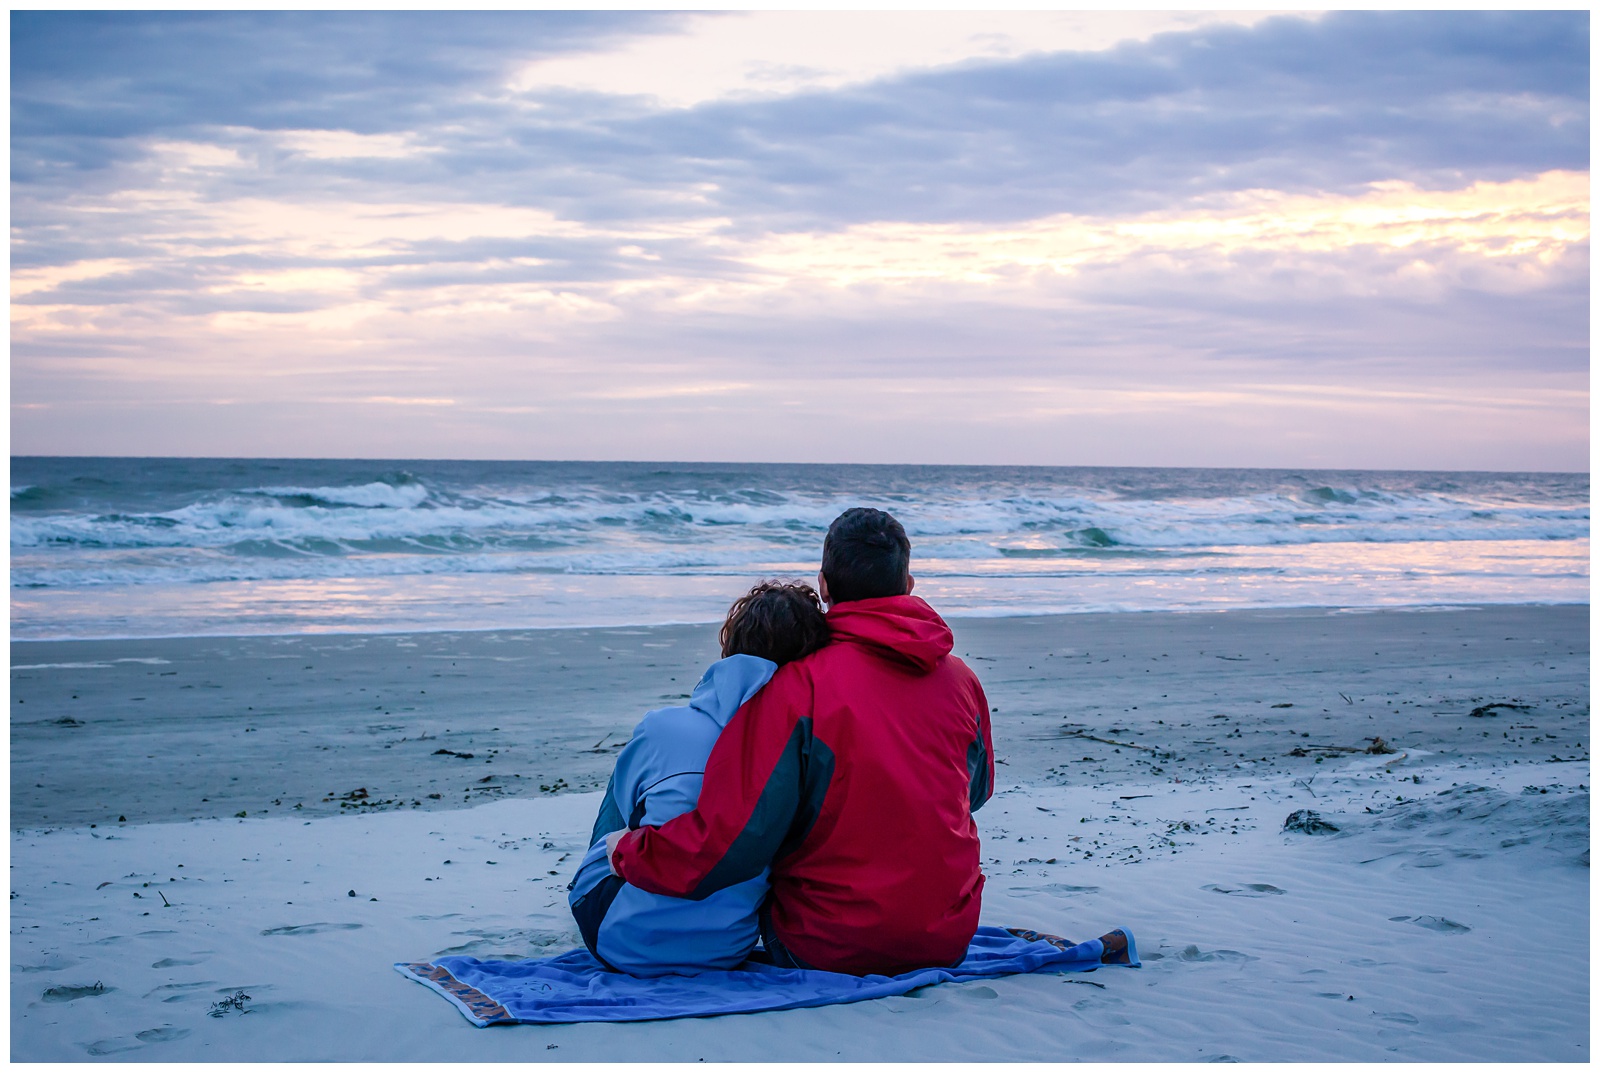
Us with a New Year’s Eve sunrise over the Atlantic Ocean. This is one of those must-have shots that required a self-timer setting and a tripod — since no one else was at the beach at that hour! And although we didn’t get up at the crack of dawn only for the photo, it was a planned perk.
Must-haves will differ from person to person and trip to trip, but mine tend to include nice light (often at golden hour), a setting that’s representative of the destination as a whole and a pose that’s more creative than the standard standing-side-by-side and smiling (although over the course of a trip, I take a ton of those too!). I also try to ensure the outfits of everyone in the shot look good together, at least inasmuch as the colors complement rather than clashing.
Whatever qualifies as a must-have photo for you, it’s worth a little intentionality to bring it to life — and if you’re anything like me, you’ll also have a lot of fun doing it!

I'm a print-journalist-turned-wedding-photographer who fully believes in the value of telling true stories beautifully. By means of a camera, I am a curator so my clients can be keepers of their most important moments.
start here
weddings over here:
take this quiz to create
a timeline for your day!
a nature trail
session in autumn
an elegant summer wedding at the elms
TIPS FOR TOP-NOTCH TRAVEL PHOTOGRAPHY
weatherproof
your wedding day


